There was a great question on the Follett Destiny Users for Librarians Facebook group today asking how to print a large number of labels for processing books. I had notes in a couple of different places for that, so putting them together here is helpful!
Find Your Starting Barcode
The first step is to find which barcodes you have available. One of the people posting on the thread asked how to do this. There’s a few items to consider.
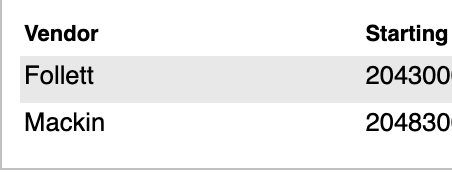
1. Check your Admin – Site Configuration – Site Administration – Library Vendors. There may be ranges set aside for your vendors there. You will avoid those barcodes.
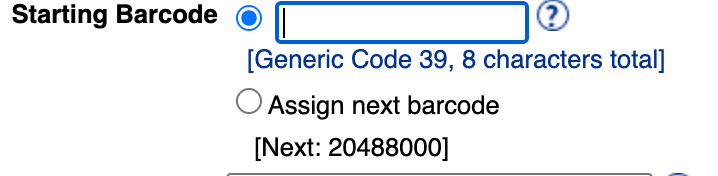
2. You can look at the number in “Assign Next Barcode” when you add a new copy. But, looking at mine, it would put me AFTER my vendors.
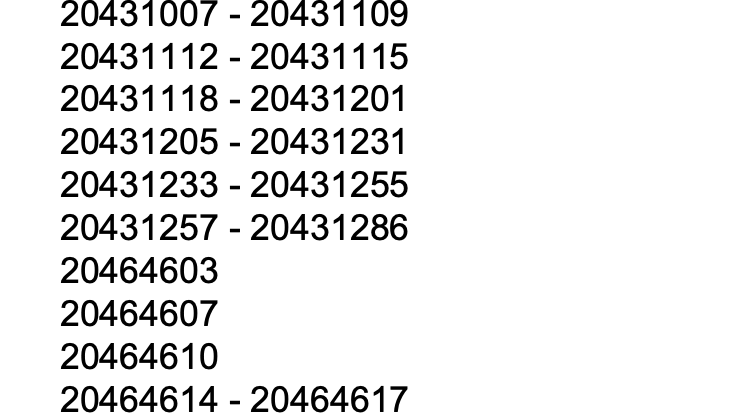
3. You can see what barcodes have been used and where the big chunk has let off. Go to Reports – Library Reports – Barcode Lists. Make sure it says Used Barcodes at the top. Run the Report. You will see a ton of barcodes. I can see where it seems my barcodes end and a vendor has begun. I may pick 20431287 according to this screenshot. (I’ll have to compare to my notes at school). Or another similar logical big chunk that is NOT a vendor chunk of barcodes.
Find Unused Barcodes
- Go to Library Reports
- Barcode Lists
- Unused Barcodes (dropdown menu)
- Set number of barcodes (999 to get a long list)
- Set starting barcode. For my building in May of 2025, that number was 20402804.
- Run Report
- View Report and Print
- Refer to the printed report.
Printing Unused Labels
Refer to the printed report.
- Go to Library Reports -> Labels -> Barcode Labels.
- Choose Print Copy Barcodes
- Choose UNUSED in the top right corner
- Since we are using 5160 labels with 30 per sheet, choose a number of barcodes that is divisible by 30 (ex 120, 360, 600)
- Another user mentions that their printer gets “off” when printing more than 90 labels.
- Put your starting barcode number (example my school’s was 20402804 in spring of 2025.)
- Check site name box
- Specific to my printer: For horizontal offset, choose -5. For vertical printer offset, choose 5.
- Run report.
- Download the PDF. You will need to be sure that it is printed to scale 100%.
Printing Issues with Labels?
Download the pdf. Open in your pdf reader (Preview or Adobe) instead of the browser. Try print with the Scale at 100%. If that doesn’t work, try Scale to Fit. One of those should work. Once you find the magic formula, repeat. But always download the pdf.
- Download the pdf.
- Open in your pdf reader (Preview or Adobe) instead of the browser.
- Try print with the Scale at 100%. If that doesn’t work, try Scale to Fit. One of those should work
Once you find the magic formula, repeat. But always download the pdf.
Note: My spine labels use Demco 5 x11 label stock. Printer offset Horizontal 25. Vertical 20. My barcode labels use Avery 5160s. Horizontal -5. Vertical 5.
BONUS TIP: A Dollar Tree or Five Below tracing light box makes checking those label lines so much easier than holding up to a light. And they are a great MakerSpace tool. https://www.fivebelow.com/products/tracing-light-box-825in-x-984in?variant=9080566&sr=1
What is your biggest Follett Destiny label tip?

Leave a comment